Wednesday, November 30, 2011

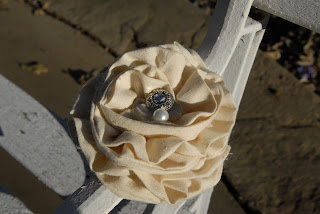
Fabric Flower

Hey,
I am so excited to share with you one of my favorite crafts...FABRIC FLOWERS!!!! I Think a fabric flowers makes every outfit elegant and feminine. Here is the tutorial to make your own.

First of all here is my sewing machine
 Here is my sewing table. . .
OK now for the tutorial! Take some fabric and cut it about 4 inches wide and the maximum length of the fabric you bought. Sew along the edge with the open seam (I use a sewing machine, but hand stitching works well also). By doing this step you are closing off the unfinished end (the end that is not folded).


 Once, the sewing is finished turn the strip inside out. This makes a “tube”. Press the “tube” down so it lays flat (ironing is also good to do but is not essential). Next, sew down the middle of the strip. When sewing down the middle, be sure not to tie off either of the ends. Also leave plenty of thread on either end of the strip.

 If you used a sewing machine, carefully pull the bottom thread firmly while holding the rest of the fabric strip. This will cause a cute ruffle.

After pulling from both sides of the strip to create a continuous ruffle all the way down, tie off both ends. If you didn’t use a sewing machine do the same thing except use the one thread.

Now for the fun part, fold the strip in half (long ways) and lay it flat. Curl it into a spiral and hot glue it down periodically.


When you finish it should look like this. . .

Add jewels and buttons to the center!

All Done!!!
Fabric flowers have so many uses. Hot gluing a bobby pin onto the flower makes it an adorable hair accessory. Hot gluing or sewing the flower onto a headband is also a fashionable way to wear it. Putting a pin on the back so that it can attach to a shirt or jacket makes a great gift. You can also glue the flower onto a bag, lamp shade, hat, or basket. The possibilities are endless! If you have any other ideas, please leave a comment in the comment box below! Have fun!


Monday, November 21, 2011

Shoe Makeover

Hey everyone,
Vans and Keds are really in style right now. That is why when I saw the idea for a shoe makeover, on the blog "Sweet Verbena" I knew I had to do it. Go check out her tutorial at http://sweet-verbena.blogspot.com/2011/05/shoe-makeover.html. These are my before and after pictures. . .

The shoes were only five dollars at Walmart! Great idea huh? Happy crafting!


Monday, November 14, 2011

Sunset

Oh My Goodness!!! The sunset last night was gorgeous! I love watching the sun go down. Wow our God is an awesome God!!!


I took this one sideways. . . It is kinda cool.

Enjoy the blessings God gives you everyday. Each moment of life is truly a gift!


Pumpkin Carving

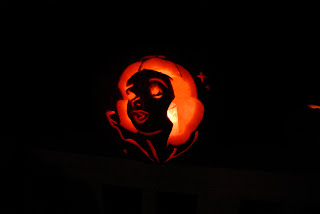
You gotta LOVE pumpkin carving! It is so fun. I love finding a cute pumpkin and then an adorable pattern to match it. Every year my family has a pumpkin carving contest (everyone is getting so good it is hard to keep up).

Some Pumpkins are cute... 

Some are scary...

This is is mine :)... It is Scar form The Lion King.
My little brother carved this all by himself (first time). This is the bird from  the iPod game Angry Birds.
My other brother did a 3D pumpkin for the first time. It turned out great. Sorry for the bad picture!

Next year your family should try out this fun contest. I look foreword to it every year. :) Thanks for stopping by!


Tuesday, November 8, 2011

Super Easy White Board

Hey Everyone,

Today I am going to show you a super cute message board I made. If you are looking for a cheap, quick, and  easy craft than this is perfect for you.

All you need is a cute frame...


And a piece of patterned paper that will fit in your frame...

This pretty green paper is the one I chose to use. I got in in a $5 pack at Walmart in the craft section. I LOVE all the paper that came in the pack...


All I did was put the paper in the frame. It turned out so cute! I also took a dry erase pen and covered it with patterned masking tape.


All done!!!! It only took me a few minutes but it is so cute! Happy crafting!!!!


Tuesday, November 1, 2011

Homemade Cards

I LOVE making homemade cards! Today I want to show you a cute card I made. :)


When I make cards my best friend is my Slice. It is a paper cutting machine.
I love the person who invented this because it makes life so much easier.

I started with a brown piece of paper, added some ribbon and glitter (cause you can't go wrong with ribbon or glitter. . .or diamonds, or flowers, or patterned paper. . . you get the idea).

After brushing off the extra glitter, I cut out letters with my Slice.
Next I embellished it a little with diamonds and a flower. . . Then voila!

Finished and gorgeous! What do you think. . . any ideas?


Popular Posts